It was Mike Linnemann who finally made it happen.
“You know what you guys need to do?” he asked, looking at Eric Klug and me.
I knew what Mike was going to suggest as soon as he asked the question. It wasn’t the first time someone had told me I should make a 3D version of a paint-altered card. Klug’s response confirmed that he’d also heard it more than once before. We talked a bit about the challenges it would involve and why we hadn’t tried it before, but Mike would have none of it.
“Seriously. We need to get this done. For America.”
Bigger & Better
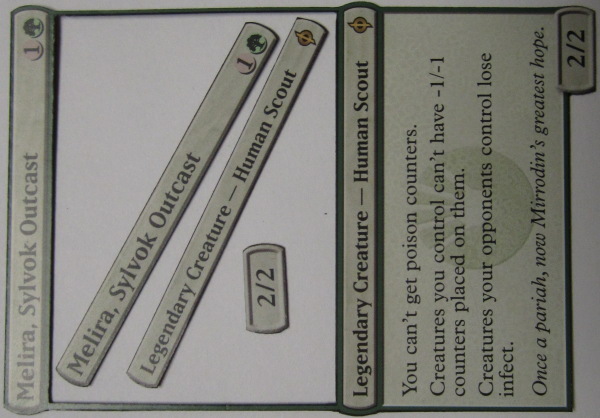
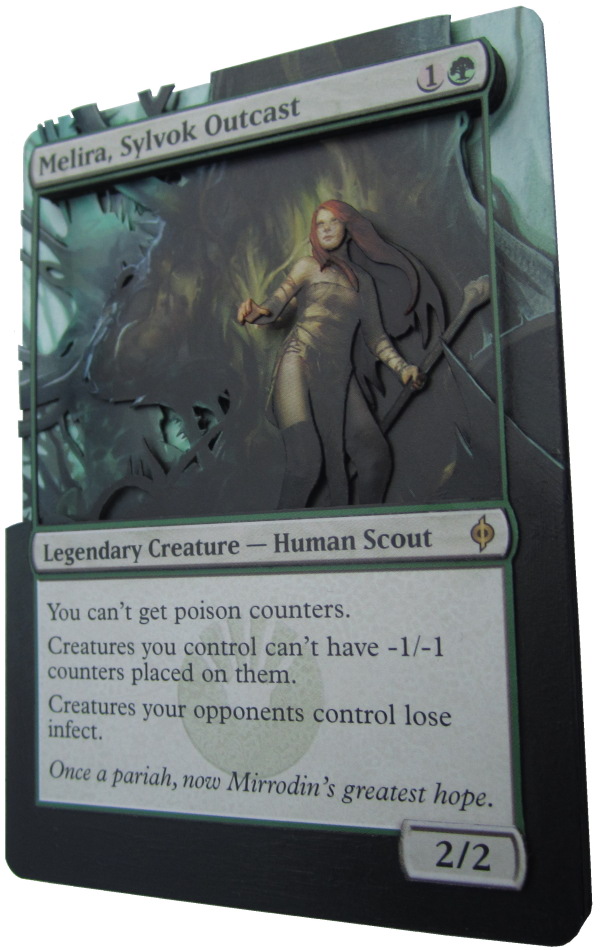
During that dinner at GenCon, I’d laughed and moved on, filing the idea away as a possibility for an article in the far future. It turns out the future wasn’t as far off as I expected; the next day, Mike handed me a stack of Melira, Sylvok Outcast that he’d picked up on the trade floor.
A few weeks later, at PT: Philly, I talked a bit about card alteration with Rich Castle (the guy behind Inside the Deck). We talked about how the alteration community is always trying to make more challenging and creative works, and we wondered what was down the road. It made me glad that I had the Melira in process; I want to make sure I’m always pushing myself to try new things, as well.
One of the most interesting card alterations I’ve come across recently is this Cold-Eyed Selkie, painted by Mathieu Jacomy:
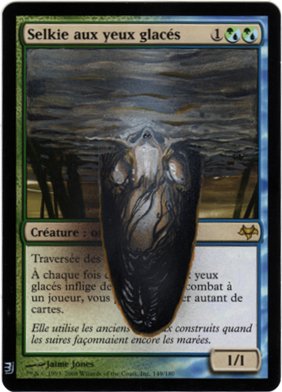
It looks a little odd at first glance, for sure. Why is the Selkie upside-down, and what’s with the cone-head? Anamorphosis, that’s what. From his vantage point on the other side of the table, your opponent will see the Selkie’s head sticking up out of the top of the card!
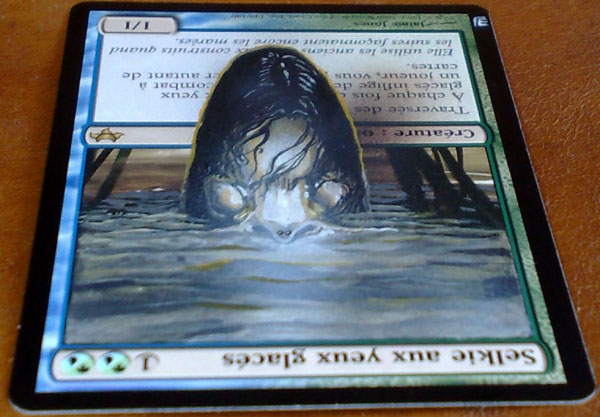
The 3D effect is pretty impressive—much cooler than I would have thought possible without actually cutting up cards. Bien fait, Mathieu!
Planning Melira
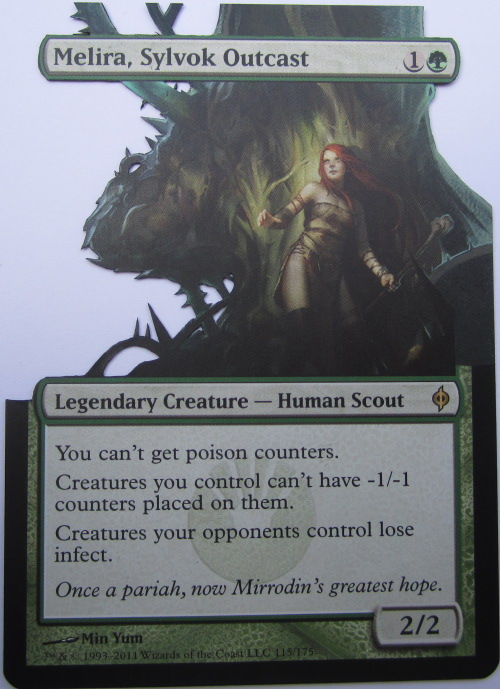
When it came time to make the extended-art Melira, I was glad to be working with one of the best. Since I would be doing the final construction of the card, the first thing I needed to do was figure out what layers I wanted to work with, so that Klug could make them.

While looking at the art, I saw a handful of primary layers:
- The far background of the forest
- The tree on the left side of the card
- The large tree directly behind Melira
- Melira herself
- The spiky growths in the lower-right corner, in front of Melira
Since Melira’s layer (4) doesn’t extend beyond the borders of the card, I only asked Klug to make extensions for the other four layers—still a very tall order! However, since my plan was to cut away or cover the background in each layer, as usual, it wasn’t going to be four full extensions. For example, only layer (5) needed to be extended below the type line, and layer (2) only needed to be extended a little bit off the side and top.
Before starting, Klug sent me a mockup of the areas he planned on painting. After a little back-and-forth to get things just right, these arrived in the mail:
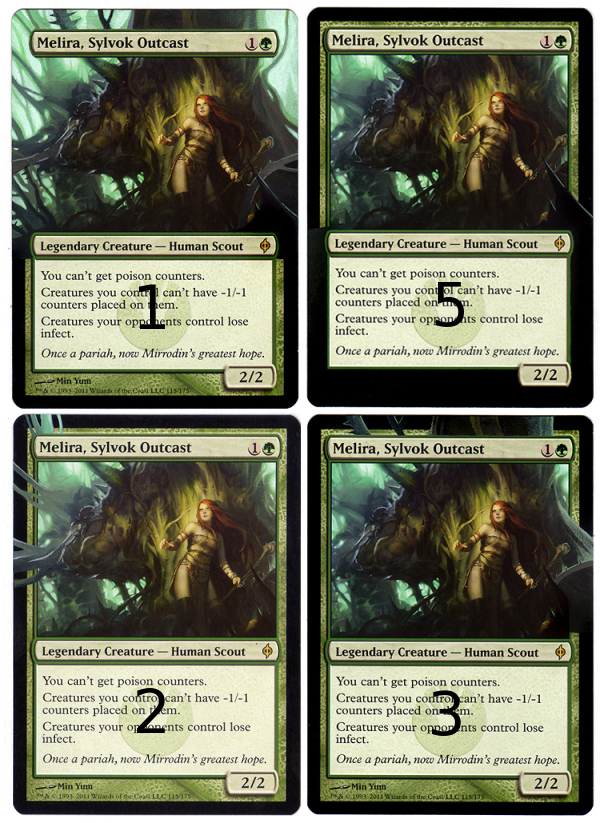
I saw a bit of Klug’s work in person at GenCon, but after working with this set of cards for hours, I found myself even more amazed by what he does. The color-matching is spot-on, and the brush lines are completely hidden. To experienced painters, those might be considered pretty basic things, but after messing around with paint a bit on Sygg, River Cutthroat, the basics impress me plenty.
Unfortunately, I can’t give much insight into the process for making those alters. My best guess is that A Wizard Did It. If that’s not a good enough answer for you, I’d recommend checking out this article from last week; it’s full of great links about altering with paint.
Making Cuts
Since alter (1) was going to be untouched for the background, I started out cutting alter (2):

It was a bit nerve-wracking cutting the alters. Normally, if I make a mistake, I can recover by using that card in a different place in the finished 3D. With this Melira, I only had one shot at each layer.
On those two alters, you can see that I cut away part of the border next to the type box. At the time, I was considering bending back the left side of this next layer so that it curved back and created a smooth transition across the forest floor:

After determining that idea wouldn’t work the way I wanted, I cut a couple small tabs to fill in the removed border sections of alters (2) and (3).
With Klug’s alters cut down to size, I moved on to Melira herself. First, I cut her base layer:
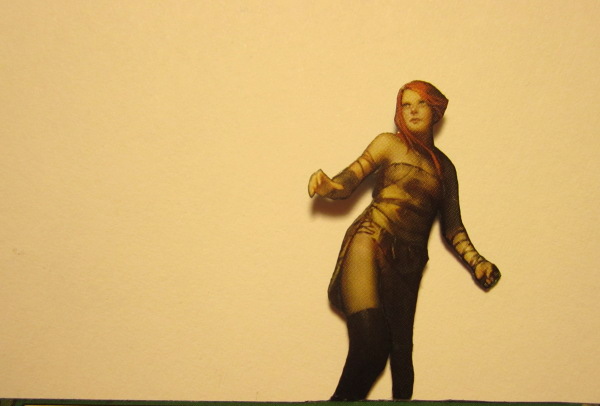
Next, I cut out all of the detail pieces I planned to add to the base layer:
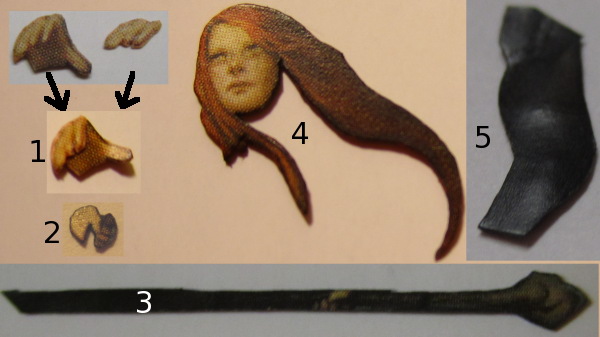
- I cut two pieces to make Melira’s right hand. The fingers were shaved thin, so they did not stick out too much, and the thumb was bent forward to make it stick out more.
- Melira’s left hand could have been done in two pieces, but I knew it was going to be hard enough to glue into place even at this size; making it two smaller pieces instead would have been even harder. This piece was also shaved to smooth the section of overlap with the arm and staff.
- Melira’s staff is shown here. I used my pottery tools to round the top of the staff.
- Because Melira’s face and part of her hair are in the same piece here, I had to make sure it didn’t all look flat. To do this, I curved Melira’s face, shaved thin the hair under her chin, and bent back the rest of her hair.
- In this picture, you can see that I worked to curve and shape Melira’s other leg.
Along with those pieces, I cut a piece to be the rest of Melira’s hair. After I assembled Melira and let the glue dry, I added the top layer:

With all my layers finished, I moved on to cutting spacers. Part of the reason I prefer to use cards to space out the layers of my 3D pieces, instead of foam, like many other 3D alterers, is that I like how solid the finished card feels. With so much cardboard packed tightly, most of my 3D cards are hard enough that if you drop one on a table, it clatters like a piece of wood.
I wanted this card to be pretty solid, but without the full border, I knew it would be different. To make the bottom more solid, I put a random common behind the back layer, even though it wasn’t necessary. My spacers for this card were two pieces each—one piece for the bottom half of the card, with everything above the type box removed, and another piece that was just the name/cost info box, like these:

Finishing Up
For the actual info and text boxes of the card, the main decision I had to make was whether or not to leave attached the pin line (the thin green line) on the sides of the art box. I cut these pieces to start:
After testing things, I decided that the pin line floating above the art looked great, so I left it on and finished assembly.
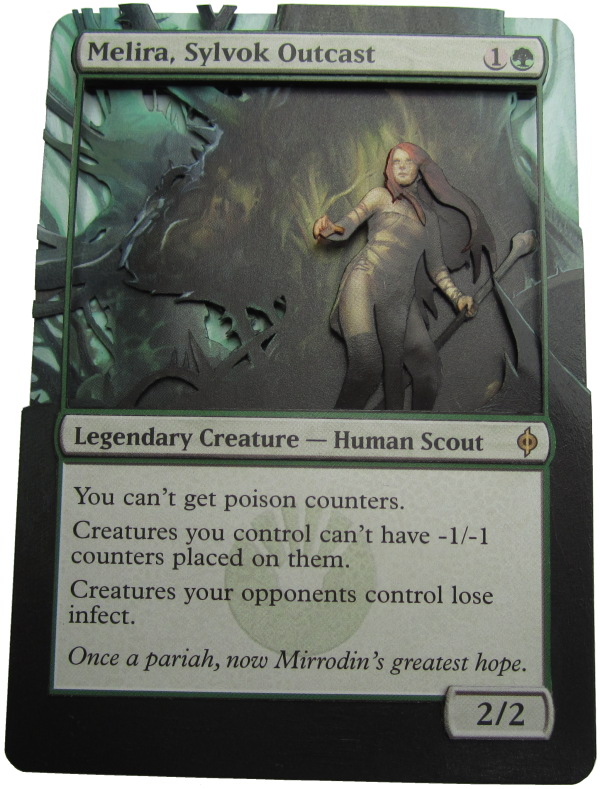
The finished stack is like this:
| Bottom Layer: | Random common (for support) |
| Layer 2: | Melira – Alter (1) |
| Layer 3: | Spacer 1 |
| Layer 4: | Spacer 2 |
| Layer 5: | Melira – Alter (2) |
| Layer 6: | Spacer 3 |
| Layer 7: | Spacer 4 |
| Layer 8: | Melira – Alter (3) |
| Layer 9: | Spacer 5 (with part of Melira in this space) |
| Layer 10: | Spacer 6 (with part of Melira in this space) |
| Layer 11: | Melira herself |
| Layer 12: | Melira – Alter (5) |
| Layer 13: | Melira – Text/info box with pin line |
| Layer 14: | Info boxes raised |
Once again, I want to give a big shout-out to Eric Klug for his great work on the extensions, and to Mike Linnemann for making this project happen in the first place.
Also, many thanks to everyone who voted in the Altered Reality Challenge! I was excited to see that I wasn’t the only 3D alter to enter—nice job, Tyler. I don’t think I’ll have a chance to enter ARCs for a while, so it’ll be up to all of you to keep 3Ds represented.
Drew Sitte
AlteredCity at gmail dot com
@AlteredCity on Twitter