Welcome to the final five. Or six, I suppose, if we do a colorless deck for the final article. We're now into four-color commanders, which didn't exist the last time we went through the whole color wheel. Just for fun, we're going to explore the actual four-color commanders for these four decks. There are Partner-y ways to get to the four color options, of course, but we're going to stick with the full palette on a single creature. We're without Green today, which means there's only one option available to us.
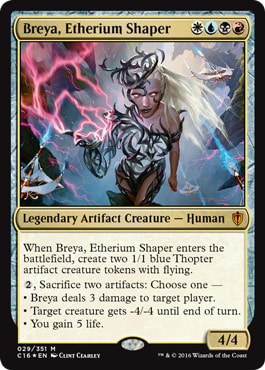
She's pretty powerful. She's got a bevy of useful abilities, and some of them can be quite impressive. By teaming her up with abilities like Fabricate and cards like Thopter Assembly, one can shoot down a lot of various creatures, do damage to players and 'walkers alike, and even (for some reason) gain life. That's all well and good. The thing is, I'd like to explore at least reasonably less-traveled paths with these creatures, and that means looking at what else we can do with them. And with Breya, I decided what I really wanted to do was go infinite. I want to kill the table with her, and I want to do it all at once.
This set me down the path I now call "convoluted combo." I've also heard it described as "a Handgun from Ikea" - it probably won't work, but if it does, WOW. I couldn't find a simple two-card combo with her, because we have to do too many things - we need her to enter the battlefield, we need mana, and we need to be able to sacrifice artifacts. And besides, the point isn't to build the most optimized version of Breya, it's to build a combo version of Breya.
(While we're at it, we're going to ignore face-down tutors, or even face-up tutors that get any card. Feel free to run them if that's your jam, but for this deck, I think it's more fun to keep some inconsistency and challenge in the combo.)
Normally we go through the deck piece by piece here, but instead, we're going to walk through the combo, then we'll discuss how the rest of the deck supports the combo. There are a few options along the way, but really the most important piece (aside from Breya herself) is one card:
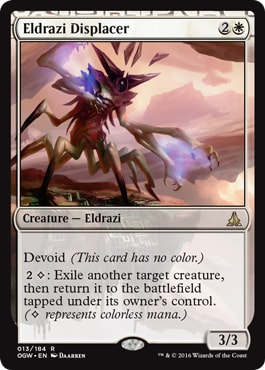
There are a few ways to get Breya to enter the battlefield over and over, but most of them are too mana-intensive or too limited. We can flicker her with cards like Flicker, but they're single use, so now we're into Archaeomancer territory, and that seems expensive. We can bounce her with something like Crystal Shard (a worthy backup plan for sure), but then we have to recast her. Even though it's only 4 mana, it's 4 mana of different colors. That seems like a hassle. The truth is, Eldrazi Displacer is our best bet in all forms.
For three mana, one colorless, two generic, we can flicker Breya out and back in. No mess, no fuss, and with three more mana, we can do it again. Perfect.
That's where our next piece comes in: Ashnod's Altar. It's good we have a backup in Krark-Clan Ironworks, since the Thopters are also artifacts. With one of those two artifacts on the 'field, we can sacrifice our two Thopters for ![]() . We use three of that to pay for the Displacer's ability, flicker Breya, and make two more Thopters, leaving us with two Thopters and
. We use three of that to pay for the Displacer's ability, flicker Breya, and make two more Thopters, leaving us with two Thopters and ![]() . Rinse and repeat for infinite colorless mana.
. Rinse and repeat for infinite colorless mana.
(A quick note on Deadeye Navigator. Deadeye works the same way except it requires ![]() , so in order to pull it off, we need Ashnod's Altar and Phyrexian Altar, plus all the rest of the pieces. We sac one Thopter to the Phyrexian Altar and make a
, so in order to pull it off, we need Ashnod's Altar and Phyrexian Altar, plus all the rest of the pieces. We sac one Thopter to the Phyrexian Altar and make a ![]() , the other to Ashnod's Altar and make
, the other to Ashnod's Altar and make ![]() , and we end up in the same situation. This combo is in the deck, but is just a backup.)
, and we end up in the same situation. This combo is in the deck, but is just a backup.)
From there we're golden. Make five million mana. Flicker Breya one million times (using three million mana), making two million Thopters. Then pay ![]() a million times (using the remaining two million mana) and sacrifice all the Thopters. Spread three million damage around in 3-point increments. That should kill just about any table.
a million times (using the remaining two million mana) and sacrifice all the Thopters. Spread three million damage around in 3-point increments. That should kill just about any table.
The first thing we need to do is find our pieces. Without using traditional Demonic Tutor-style tutors, we're going to have to find Eldrazi Displacer in different ways. My go-to when wanting to combo "fairly" is Transmute! It's pricey, it's limiting, and there aren't that many of them. In this case, we have three Transmute cards which can find us the Eldrazi. In addition, they'll all find Ashnod's Altar, as will Trophy Mage. We're also running a pair of Transmute cards that will find Krark-Clan Ironworks. If it says "Transmute" on it, it's designed to find a combo piece - don't try to figure out what other use it has. It doesn't. Additionally, we have a bunch of ways to Scry; rather than draw a ton of cards, we're instead going to dig like crazy, looking for the Transmute cards or combo cards we need. The best is probably something like Hedron Alignment, since we can use much of our excess mana to Scry a whole bunch. Crystal Ball is great, but the tap limitation hurts.
Second, we need to stay alive long enough to pull all this off. We'll do this in a few ways. We're in Blue, so we may as well run a few Counterspells. We want to hold these, though, until the very last minute; we'll use them to protect our own combo or to prevent someone else from comboing off. We've also got some excellent removal spells, because we've got the great ![]()
![]() ones like Utter End and Merciless Eviction, plus the creature removal and world destruction from
ones like Utter End and Merciless Eviction, plus the creature removal and world destruction from ![]() . Finally, we've got a few ways to build a fort, cards like Propaganda and Ghostly Prison, but also Teyo, the Shieldmage and Ethersworn Canonist.
. Finally, we've got a few ways to build a fort, cards like Propaganda and Ghostly Prison, but also Teyo, the Shieldmage and Ethersworn Canonist.
We've got a few more things which synergize nicely with our general idea of putting together this combo and just winning. First is a second, more convoluted, combo. With Panharmonicon on the battlefield and Sword of the Meek in the graveyard, plus some way to cast Breya over and over again (can be Eldrazi Displacer, of course, but in this case could also be Crystal Shard) we can use Time Sieve to take infinite turns. Have Breya enter the battlefield, then sac the four Thopters and the Sword to the Time Sieve. Next turn, cast Breya again and Sword of the Meek will pop out of the 'yard attached to a Thopter. Sac them again. This requires a bit of mana - at least five, two of which are Blue, but that's not that bad. Plus, since it goes infinite, we can keep drawing until we've drawn enough lands to win. We could cast Breya twice per turn and build up an army of Thopters to win. We could assemble our other combo. We could just hope the table gives up in the face of our infinite turns. Whatever.
We can also weirdly win with Mechanized Production, especially if we have Panharmonicon on the Battlefield, or something like Thopter Spy Network. (Remember colorless Thopters and Blue Thopters have the same name.)
Our final strange card is Beacon of Unrest. This five-mana sorcery returns a creature from our 'yard to our 'field, and more importantly, it shuffles itself back. This is our Hail Mary card to get back Eldrazi Displacer in case it winds up killed.
40 lands, no ramp because we don't need it.
Breya, Etherium Shaper | Commander | Mark Wischkaemper
- Commander (1)
- 1 Breya, Etherium Shaper
- Creatures (11)
- 1 Baleful Strix
- 1 Deadeye Navigator
- 1 Dimir House Guard
- 1 Drift of Phantasms
- 1 Eldrazi Displacer
- 1 Ethersworn Canonist
- 1 Marionette Master
- 1 Sigiled Starfish
- 1 Tribute Mage
- 1 Trophy Mage
- 1 Windborn Muse
- Planeswalkers (4)
- 1 Ral, Storm Conduit
- 1 Saheeli Rai
- 1 Saheeli, Sublime Artificer
- 1 Teyo, the Shieldmage
- Instants (13)
- 1 Anguished Unmaking
- 1 Clutch of the Undercity
- 1 Counterspell
- 1 Despark
- 1 Dovin's Veto
- 1 Drown in the Loch
- 1 Mortify
- 1 Narset's Reversal
- 1 Path to Exile
- 1 Perplex
- 1 Swords to Plowshares
- 1 Utter End
- 1 Wear // Tear
- Sorceries (9)
- 1 All Is Dust
- 1 Beacon of Unrest
- 1 Dimir Machinations
- 1 Merciless Eviction
- 1 Phyrexian Rebirth
- 1 Ruinous Ultimatum
- 1 Supreme Verdict
- 1 Vandalblast
- 1 Vindicate
- Enchantments (8)
- 1 Ghostly Prison
- 1 Hedron Alignment
- 1 Leyline of Sanctity
- 1 Mechanized Production
- 1 Propaganda
- 1 Sphere of Safety
- 1 Thopter Spy Network
- 1 Whirlwind of Thought
- Artifacts (14)
- 1 Ashnod's Altar
- 1 Crystal Ball
- 1 Crystal Shard
- 1 Darksteel Pendant
- 1 Ichor Wellspring
- 1 Krark-Clan Ironworks
- 1 Mycosynth Wellspring
- 1 Norn's Annex
- 1 Panharmonicon
- 1 Phyrexian Altar
- 1 Seer's Lantern
- 1 Sunset Pyramid
- 1 Sword of the Meek
- 1 Time Sieve
- Lands (40)
- 1 Island
- 1 Mountain
- 1 Plains
- 1 Swamp
- 1 Arcane Sanctum
- 1 Azorius Guildgate
- 1 Cascade Bluffs
- 1 Castle Vantress
- 1 Choked Estuary
- 1 Coastal Tower
- 1 Crumbling Necropolis
- 1 Darkslick Shores
- 1 Evolving Wilds
- 1 Eye of Ugin
- 1 Fetid Heath
- 1 Glacial Fortress
- 1 Graven Cairns
- 1 Inspiring Vantage
- 1 Meandering River
- 1 Mystic Monastery
- 1 Nomad Outpost
- 1 Port Town
- 1 Prairie Stream
- 1 Rugged Prairie
- 1 Scoured Barrens
- 1 Seachrome Coast
- 1 Sejiri Refuge
- 1 Sunken Hollow
- 1 Temple of Deceit
- 1 Temple of Enlightenment
- 1 Temple of Epiphany
- 1 Temple of Malice
- 1 Temple of Silence
- 1 Temple of Triumph
- 1 Terramorphic Expanse
- 1 Thriving Bluff
- 1 Thriving Heath
- 1 Thriving Isle
- 1 Thriving Moor
- 1 Tranquil Cove
So, we Scry and build up our defenses while looking for our combo pieces, either via Transmute or just digging. We do whatever we need to do to survive and assemble the combo, then just beat the table all at once. Probably not as simple as it sounds, but it should be fun, and because it's not in a terrible hurry to get the combo, it will probably be fun to play several times, which isn't always true with combo decks like this one.
One question for you: does this deck want Storm the Vault? Might be good.
Next time we'll explore a world without White, which should be fine. In the meantime, please share your Breya thoughts - what else could be done with her that's less on the beaten path? Share your ideas in the comments!
Thanks for reading, and stay safe.