I avoided it for a long time. I didn't want to do it. I knew it was going to be challenging and feared it wouldn't turn out well.
Foils.
Not long after I started making 3D cards for the Middle Earth CCG, I came across the article about Seishiro Ohkubo in which Ted Knutson showed this picture:
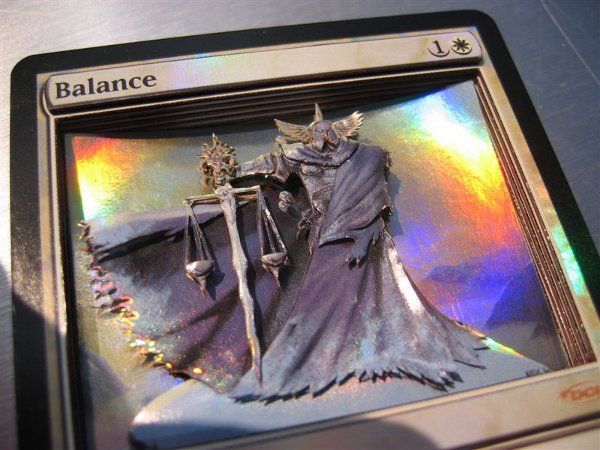
At the time, this was $500 worth of Balances.
While that card looks amazing, Ohkubo mentioned that he didn't like working on foil cards because they are much harder to cut and manipulate. At the time, I didn't think much of it; I was only cutting Middle Earth cards, and they never made foils. Once I switched to Magic cards, however, the question was constant.
“Have you made any 3D foil cards?”
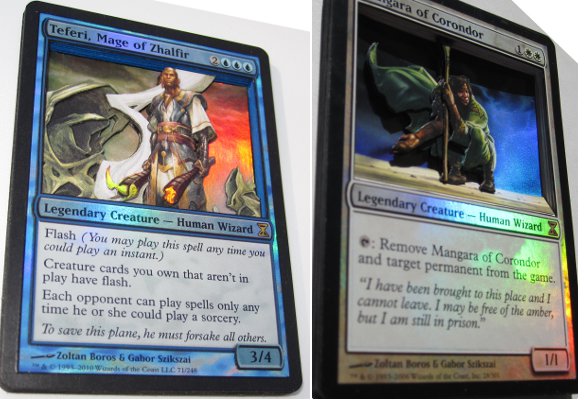
Initially, I went halfway, making partially foiled versions of a couple mono-colored Commanders.
When I finally agreed to make a fully foiled 3D card, it was because the Todd Lockwood version of Rith, the Awakener was only ever printed as a foil—in the From the Vaults: Dragons set.
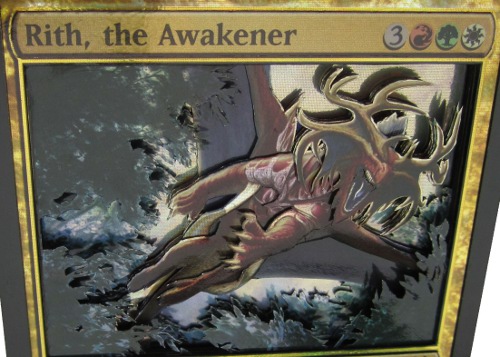
Cutting and weaving the foil layers was even harder than I expected. Getting smooth cuts was difficult, my blades broke constantly, and coloring the edges was less effective. Still, I was happy with the finished card and was glad I'd made it.
When the Commander preconstructed decks were released, and with them, the oversized, foil legendary creatures, I knew at some point I would have to try my hand at one of them. I didn't expect the one I made to be Edric, Spymaster of Trest.
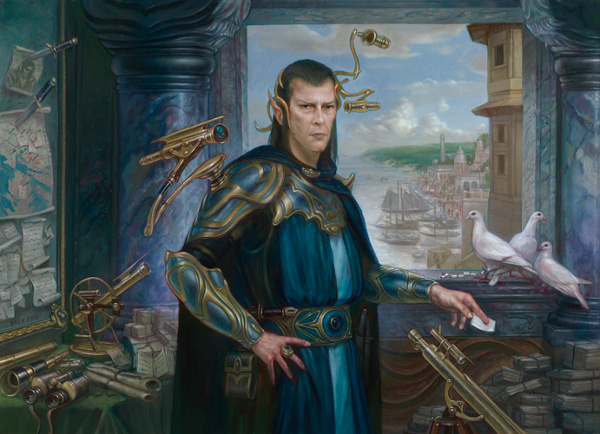
He has some very complicated art, but Jesse (@pluckmyeyeout) got me excited about giving it a try. Let's see how it went!
Getting Started
During the planning stage for most of the 3D cards I make, I typically break down the card into a series of layers in my mind. Next, I write out a list of all of the smaller elements of the art that I would like to detail. If you're not already taking some time before you start cutting to plan and organize what you want to do, I strongly encourage you to do so. In my experience, it both saves time and leads to a higher-quality finished product.
When it came time to work on this oversized foil Edric, Spymaster of Trest, I started to organize Edric into layers as usual, but I quickly realized that Edric made more sense to me if I split him into three zones instead of a series of layers.
Zone 1: Edric and the telescope
Zone 2: The room
Zone 3: The far background
A factor I had to consider in planning this card was how the larger size would affect my process. At first, I thought that the larger art meant that the difficulty of cutting foils might be mitigated because the pieces I would be cutting would be slightly larger. When I compared the oversized card to a normal card, I realized that the larger size also meant that there were more details that it was possible to highlight.
I also recognized that my normal strategy for creating space between layers would not be ideal for an oversized card. It would simply take too many spacers (cards with all of the art removed) to create the right amount of distance between one layer and the next. Many other 3D alterers have been using foam to space out their layers for a long time, but this was the first time I tried it. I bought some black foam and cut these:
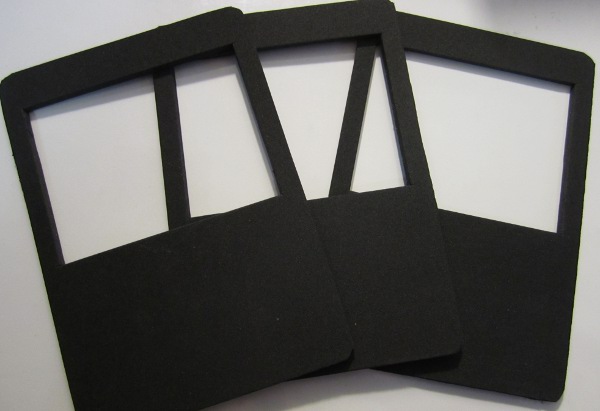
Technically, I didn't need to cut them to match the card frames exactly—a few strips of foam would have been enough—but by cutting them this way, I helped make the finished card more durable.
Edric and the Telescope
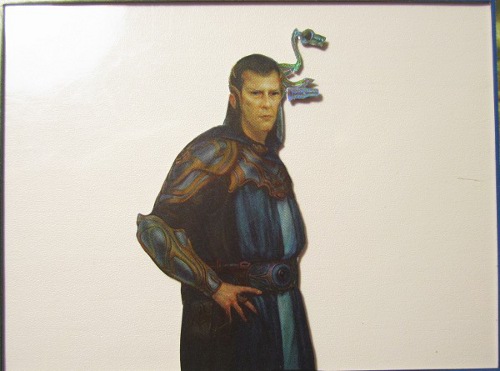
I started out by cutting the basic layer for Edric. Because I wanted his left arm and cape to be behind his body, I cut those off from the layer:
I wasn't initially planning on doing a lot of details on Edric's body, but I ended up with a list of over a dozen pieces to cut.
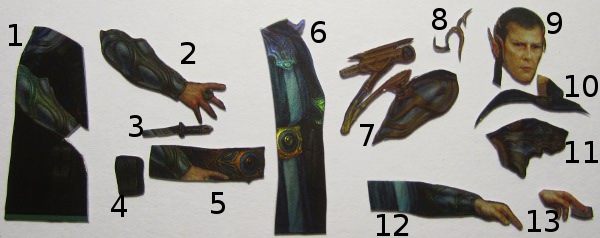
| 1) Right Cape | 6) Left Cape | 10) Cape & Brooch |
| 2) Right Forearm | 7) Shoulder Scope | 11) Chest Plate |
| 3) Dagger | 8) Earpiece | 12) Left Arm |
| 4) Pouch | 9) Face | 13) Left Fingers |
| 5) Belt |
Each of the pieces was either shaped in some way by adding curve to it with shaping tools or made thinner by removing part or all of the back of the card. Some pieces, such as the belt, needed to be thinned only a little; pieces like the earpiece needed to be as thin as possible.

After constructing Edric, only the telescope that was further forward in the art needed to be cut. I made a basic layer with everything else removed, and I bent the telescope back slightly to make it look like it was angled.
Volkan Baga did an excellent job detailing the room from which Edric carries out his masterful machinations. Of course, that also meant creating a 3D version of the room would be more challenging.
To look the best, the back wall of Edric's room needed to connect seamlessly with the side wall. In order to create that effect, I made this layer:
The slanted side wall on the left side of that picture was bent forward so it would pass into the next layer, passing the pillar on that side of the room:

The final layer of the room could have been made from detail pieces. However, doing so would have required putting in a lot of work to anchor the table well, so I used a basic layer instead.

It took some finagling but I was able to fold the table in multiple directions to give it a more realistic 3D shape. That was important to me considering the number of detail pieces I would be piling on top of it.
Speaking of which, here are those detail pieces:

To make the knives in A and B seem to be sticking out from the wall, I cut the sides away and bent them forward.
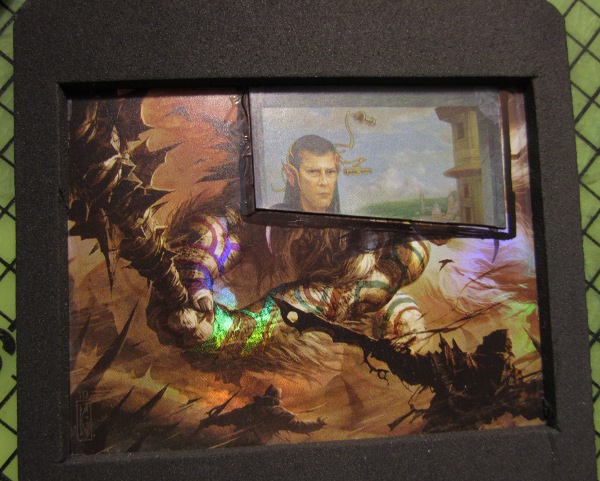
With everything cut, I went ahead and assembled the three layers, and then once that dried, I attached the detail pieces:

In the picture on the right, you can see that I also bent back the window ledge and added the carrier pigeons. I actually cut the pigeons while working on Zone 3.
The Far Background
With so many detail pieces, I was running short on actual Edrics to cut up for the layers! Since the sky in the distance was such a small piece of visible art, my actual background layer ended up being just a small chunk of Edric glued to an oversized Ruhan of the Fomori— with a foam spacer on top:
The basic layer for the town (Trest?) ended up being one from which I'd previously taken part of Edric's cape and hand:

I didn't want to add a lot of detail to the town. In some places, adding detail can make a part of the card look worse rather than of better. The town has a lot of detail, but if you look closely, things blend together a lot also. If you raise detail pieces in a situation like this, it ends up looking messy.
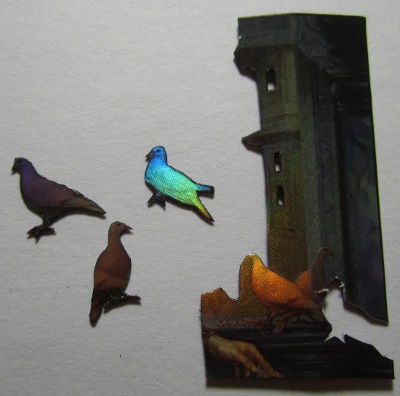
I eventually decided to make the lower part of the city lean back by cutting it loose from the top and sides and to use a detail piece to raise the nearby building. This was also the point at which I cut the pigeons from the abandoned scraps of other layers.
Finishing Up
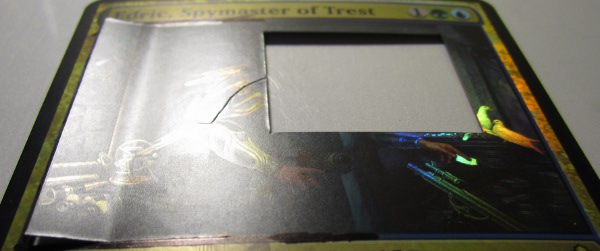
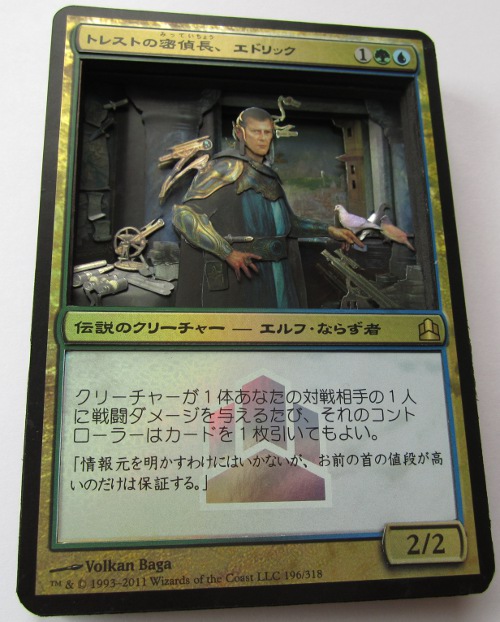
In addition to the regular foil oversized Edrics, Jesse sent along a Japanese copy to use for the text box and information boxes. I used most of that copy for the town layer, but I saved the important parts for later:
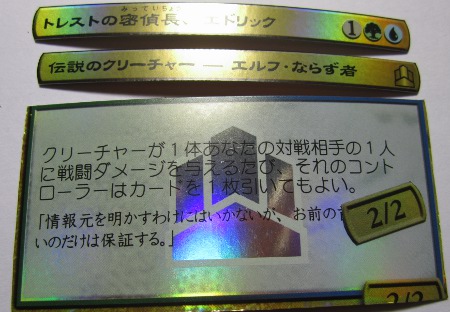
I cut out the text box from the telescope layer, putting the Japanese text box behind it and all the information boxes on top of it.
The finished stack went like this:
| Bottom Layer: | Ruhan of the Fomori with Edric's sky |
| Layer 2: | Black foam spacer |
| Layer 3: | Edric: The town |
| Layer 4: | Black foam spacer |
| Layer 5: | Edric: Walls of the room |
| Layer 6: | Normal spacer |
| Layer 7: | Edric: Pillars |
| Layer 8: | Black foam spacer |
| Layer 9: | Edric: Table and stacks |
| Layer 10: | Edric's body |
| Layer 11: | Black foam spacer |
| Layer 12: | Normal spacer with Japanese Edric text |
| Layer 13: | Edric: Telescope |
| Top Layer: | Japanese Edric information boxes |

Drew Sitte
alteredcity at gmail dot com
http://alteredcity.blogspot.com
@alteredcity on Twitter