For starters, let's talk about your materials and workstation. I use acrylic model paints in my work. These paints are specially formulated to dry as flat as possible, and they're available in a huge variety of colors at most game and hobby shops. For brushes I use a couple different sizes of synthetic/sable blend brushes (let's say one is medium-small, and the other is very small). These aren't the most expensive brushes you can get, but they aren't exactly cheap, either. Just remember this about brushes- the less you spend on a brush, the more time you're spend fishing loose bristles off of your painting. I also use an old ratty brush for drybrushing, a palette knife (anything from a plastic butter knife to a popsicle stick will do the same job) and a cheap plastic paint palette for mixing. I usually hold the cards carefully while painting, or set them on a clean paper towel.

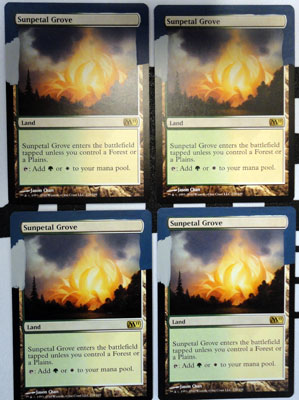
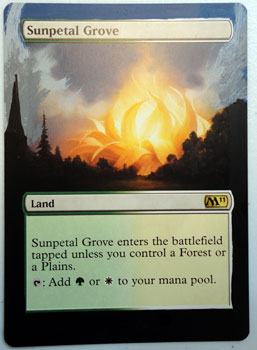
We'll be working on Sunpetal Groves. Original artist Jason Chan has given us a lot to work with here. We'll just be extended his beautiful image over those nasty borders.

Often when painting over borders it's necessary to paint a neutral color over the border first. This is necessary for brighter colors that are translucent like reds, yellows, and oranges. Luckily for us we'll be using colors that are more opaque like blue and gray.
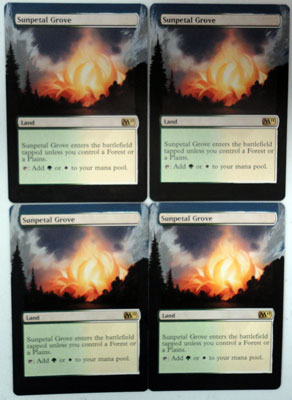
We'll start off with the sky. To match the deep hazy blue color of the twilight sky in the original artwork, I'll mix deep blue with gray. Always start with the lighter color and add the darker color little by little. Be sure to wipe off your palette knife after each color to prevent cross contamination. Once I'm happy with my color, it's time to start painting. Wet your medium-small brush in your water cup, brushing the excess moisture off on the paper towel. Then pick up some paint, and start brushing it on the border near the sky area as evenly as possible. Getting just the right amount of paint on your brush is important, and it takes a little practice to judge. If it seems like there's too much on your brush, just brush a little off onto your towel and keep going.

Now on to the next color- gray for the mist.

If you look at the picture, you can see 2 main shades of gray, a light and a dark. If you have white and black, you can mix both. If you have a gray, decide which shade your gray is closest to and mix the other shade. My gray is pretty dark, so I'll mix up a lighter shade. Remember- paints often dry a little darker than they appear wet. If you're unsure go ahead and test your mixed paints on a different surface before painting on the card. I'm going to paint a small block of solid light gray on the left side of the card first.
Here's where we use a little magic. Take your old brush and get some paint on it. Wipe most of the paint of so there's just a little on the end of each bristle, ant the bristles are separated.
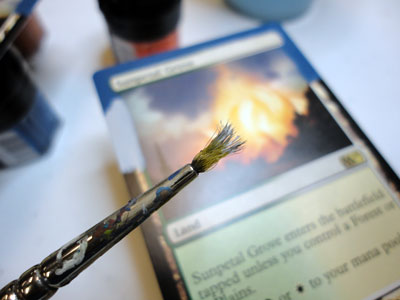
Now start in the already painted gray section and lightly drag the brush und in a quick short stroke. Try and blend it into the rest of the gray, and do the same a few times over the light gray in the original picture. Then work it on the gray on the other side.
Once you're done with that, pat yourself on the back and breathe a sigh of relief. You're done with the hardest part of it this alteration (that wasn't too bad, right?). Using the same technique, brush the darker gray in the bottom half of the light gray as shadow. Use the darker gray original artwork as a guide. Make sure to completely cover the border between our first block of light gray and the original artwork.
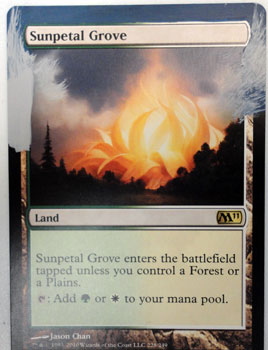
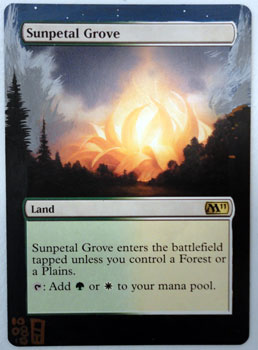
It's time to get rid of that pesky border once and for all. Grab your medium-small brush again, and paint black from the tops of the trees on one side, all around the border to the tops of the trees on the other side.

And now for the finishing touch we're going to add a happy little tree on the left. Start by making a thin triangle about a quarter of an inch to the left of the tree on the left in the original artwork.
When this dries, take your "very small" brush and paint horizontal lines up and down our tree with quick short strokes.

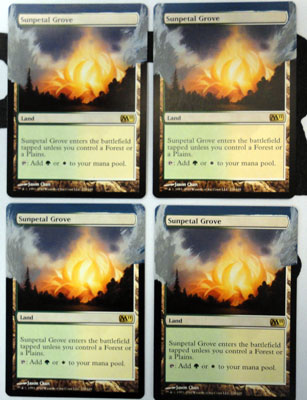
And that's it! Sign the cards and date them if you like, and you're ready to put them on the refrigerator, in your deck, or sell them to your friends!
Optional touches
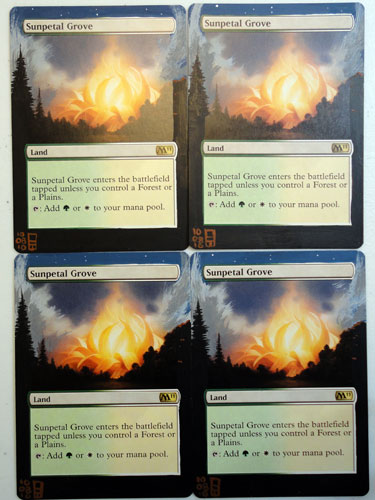
If you're feeling confident with your painting so far, and want to do a few tiny finishing touches, here are a couple things you can try. Mix up a tiny bit of a rusty orange color (try orange with just a drop of brown. A bright red with just a drop of bright green would work too). Take your "very small" brush again and on the tips of the treetops we painted with black on the RIGHT side of the border, paint some tiny dabs of rusty orange, showing the reflection of the "sunpetal" on the leaves. If you don't like what you did, cover it up with a little black paint and try again! Another optional detail you can add are the first few stars peeking trough the dusk. Pick up a little white paint on your "very small" brush and in the border area we painted hazy dark blue, randomly place 6 or 7 delicate dots of white. Try and place them so that no 2 "stars" line up horizontally. This increases the illusion of randomness.
These tiny details may be a little nerve-racking at first, but I find they really make the art "pop". They also tend to make up for a few shaky strokes here and there in the rest of the painting.
I always seal my altered cards using a clear spray acrylic seal, which can be found at any art, craft or hobby store.