I’m a little upset. Okay, more than a little.
A great injustice occurred in the coverage of the recent World Championships. While the victories of Jun’ya Iyanaga and the Japanese National Team deserved their time in the spotlight, the equally impressive work of their countryman Seishiro Ohkubo was almost entirely overlooked.

GatheringMagic’s Facebook album of the event has more pictures of Ohkubo and his 3D cards than the official coverage, but it’s still not enough. If you were at Worlds and took pictures of your own, or if you have come across pictures of his cards on blogs or Twitter, please send me links! I’d like to compile them for people (including me!) to admire and learn from.
Tools of the Trade
In the first article I ever wrote for GatheringMagic, I gave a brief list of the tools I use to make 3D cards. Since I’m still asked regularly what I use, and since I’ve added a couple things to my list, I thought I’d start this week by going through my tool kit.
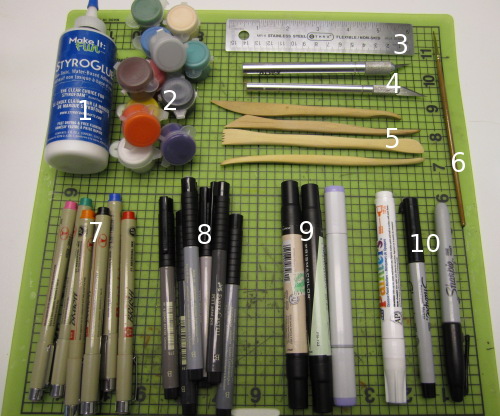
- Floracraft Make It: Fun StyroGlue—my preferred glue
- The cheap set of acrylic paint I use for hiding background elements—I don’t always use them, but I’m doing so more and more often.
- A metal ruler, which makes cutting long, straight lines quick and easy
- X-Acto knives with #11 light duty blades
- These are the clay-shaping tools that I’ve mentioned a couple of times. I use them to bend and curve the cardboard, giving individual pieces more depth. Since I’ve received a lot of questions about them, I’m going to talk a bit about shaping this week and go more in-depth next time.
- The smallest paintbrush I could find at Hobby Lobby—it’s for painting (obviously) and for applying glue to tiny detail pieces.
- PIGMA Brush Pens
- Faber-Castell PITT Artist Pens, Shades of Grey set
- A few pastel colors I’ve picked up for individual cards—the peach was for Child of Alara, the violet for Arcanis the Omnipotent, and the green for the Imperious Perfect I cut up for this week.
- A white paint pen and couple Sharpies which I rarely use these days.
Underneath it all is a self-healing cutting mat. I’ll reiterate that you don’t need all of those things to start making 3D alters. Every 3D alterer I know of uses different tools. All you really need to start is a blade to cut with and a pen to color the edges.
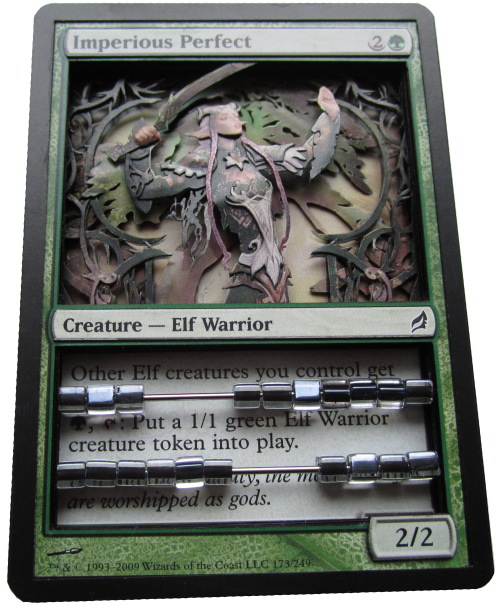
As I mentioned, the card I cut up for this week is Imperious Perfect. Scott Fischer did an incredible job on the art for the card—good enough that it was featured in Spectrum 15. The full version (about halfway down the page in that link) is especially creepy, with the arms reaching up around the elf’s ankles.
I knew it was going to be a challenge because of the large number of tiny cuts and little details, but it’s important to constantly push yourself to improve.
Getting Started
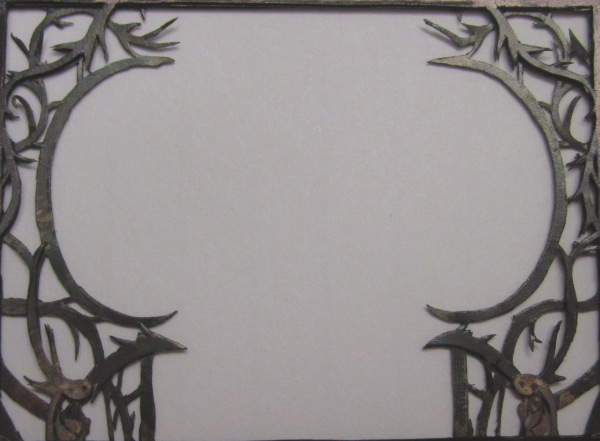
In my mind, I broke the art of Imperious Perfect into three sections: the tree in the background, the vines in the middle, and the elf in the foreground. Because I thought it was going to be the hardest part, I started by cutting out a layer of the vines:
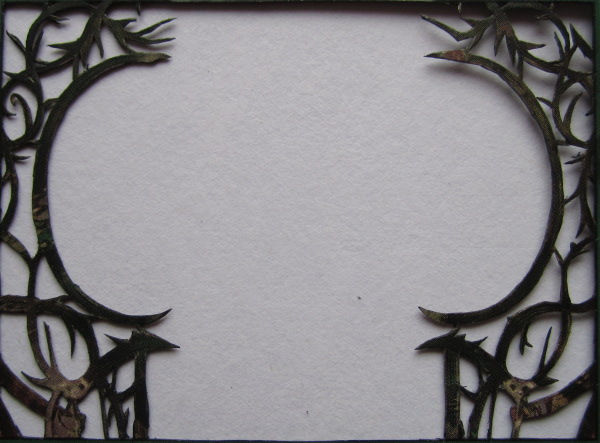
I was hoping to keep the three sections separate, but while cutting the vines, I realized it would look off if I didn’t have some of the tree leaves crossing the vines on the left side a bit. I cut a layer for the tree, knowing it would have to be cut more to accommodate that overlap.
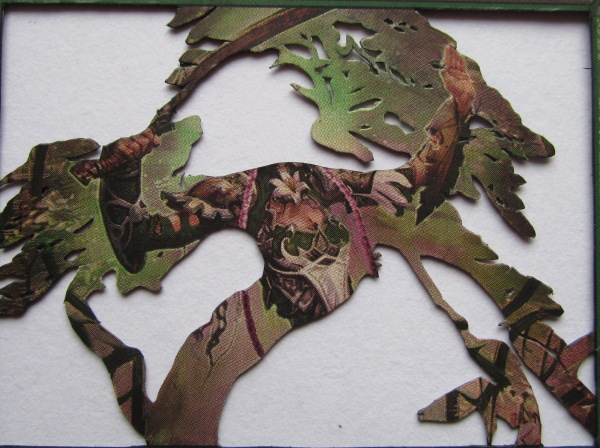
Next, I cut a base layer for the elf:
Aside on Sides
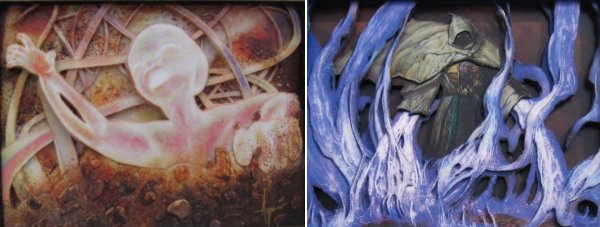
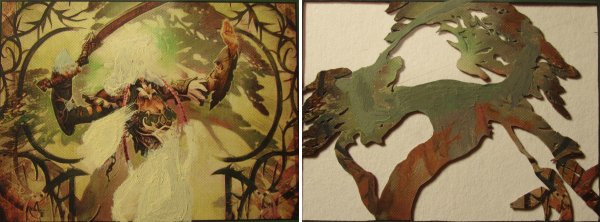
Before moving on, I want to use those three layers to highlight the importance of good edging. By “edging” I mean using pens, markers, or paint to color away the white of the inside of a card that is revealed when you make a cut. Edging can make a huge difference in how good a finished card looks. It masks rough cuts and reduces the distraction caused by the bright white cardboard.
The three pictures above were taken after I already edged the pieces shown. Here, you can see what those three pieces look like before and after I colored the edges:
The white outlines on the vines and tree looked even uglier in person than they do in the picture on the left.
Improving poor edging is the most common advice I give to 3D alterers who show me their cards and ask for advice, but I still regularly see new 3D cards that aren’t edged well. It’s not a hard thing to do, and it makes a world of difference. Please . . . edge your 3D cards!
Paint Job
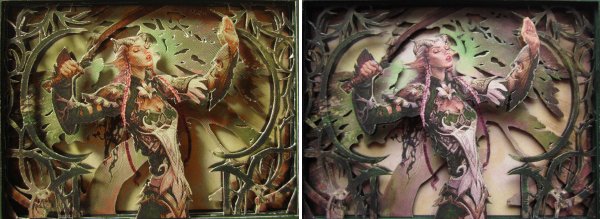
Like the Kris Mage I wrote about a few weeks ago, this Imperious Perfect was going to have an abacus in the text box. The abacus cards I make are a bit thicker than non-abacus 3Ds because they need to fit the beads, so I knew there would be a lot of space between the elf and the background. I don’t always use paint to hide background elements, but I knew this was a time when it would be needed.
I broke out my paint set and used my mediocre color-matching skills to hide the foreground elements that would be visible in the far background and the tree layer.
If I need a perfect color match I know to call on a professional, but for hiding things in the background, close is close enough.
The Details
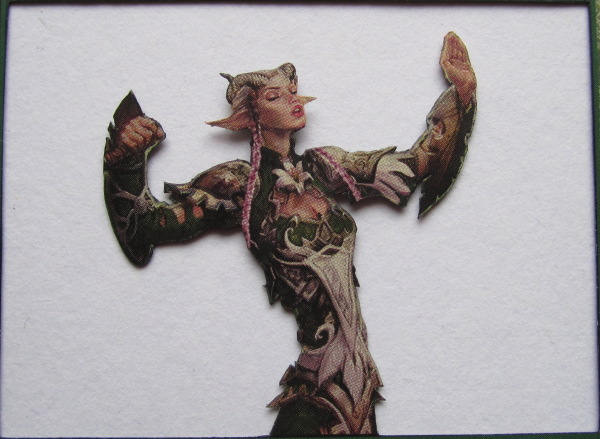
I figured out early on that the Imperious Perfect figure was going to need a lot of detail pieces to look great. I decided to have her sword be its own layer, leaning back to her hand, so I cut this layer:

All of the other details were going to be small pieces built on the sword and elf layers. Initially, I settled on these fourteen pieces:
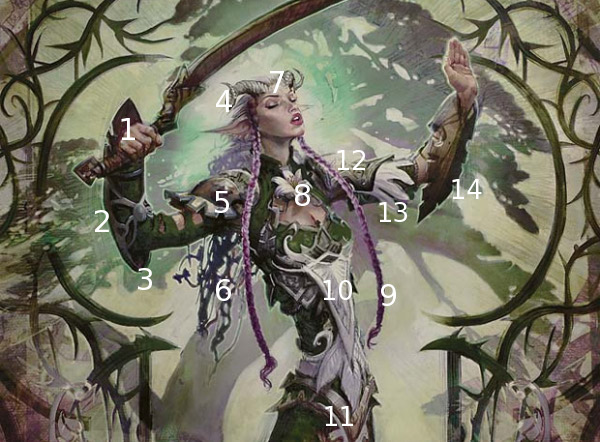
| 1. Fist | 6. Lower Hair | 11. Lower Armor |
| 2. Gauntlet Straps | 7. Face and Braid | 12. Outer Sleeve |
| 3. Elbow Pad | 8. Flower | 13. Inner Sleeve |
| 4. Tip of Horn | 9. Braid | 14. Gauntlet |
| 5. Shoulder Pad | 10. Upper Armor |

After cutting out those pieces, I realized I needed two more pieces: the tip of her left horn and the middle part of her hair (the purple bunch just over her right shoulder). I shaved the backs off most of the pieces so that they wouldn’t be too bulky. I also used my shaping tools on most of the pieces, rounding the face and fist, raising the petals on the flower, and so on.
Of course, the elf’s body needs to have some curve to it as well. I bend and press the cardboard, ending up with this:

To add more depth to the vine gate, I cut another layer with only a few of the vines in it (mostly the ones around the edges). I added that to the main vine layer and bent a few of the tips up or down to further decrease the flatness.
Finishing Up
The last bit of work I had to do before assembly was shaping the tree and making it so some of the leaves would overlap the vine gate on the left side:

After completing all the individual elements, I put everything together.
The finished stack looks like this:
| Bottom Layer: | Random common (for support) |
| Layer 2 : | Imperious Perfect: Background, Elf painted away |
| Layer 3: | Spacer 1 |
| Layer 4: | Spacer 2 |
| Layer 5: | Imperious Perfect: Tree, Elf painted away |
| Layer 6: | Spacer 3 |
| Layer 7: | Spacer 4 |
| Layer 8: | Imperious Perfect: Vines 1 |
| Layer 9: | Spacer 6 |
| Layer 10: | Imperious Perfect: Vines 2 |
| Layer 11: | Spacer 7 |
| Layer 12: | Spacer 8 |
| Layer 13: | Spacer 9 |
| Layer 14: | Imperious Perfect: Elf only |
| Layer 15: | Spacer 9 |
| Layer 16: | Spacer 10 |
| Layer 17: | Spacer 11 |
| Layer 18: | Imperious Perfect: Sword only |
| Layer 19: | Green border from another card |
| Layer 20: | Black border and info boxes raised |

Don’t forget to send in your pictures of Master Ohkubo’s work!
Drew Sitte
AlteredCity at gmail dot com
@AlteredCity on Twitter