For context, I won a Standard RCQ with Roman Fusco's ![]()
![]() deck a couple of weeks ago.
deck a couple of weeks ago.
RCQ winner#AMA pic.twitter.com/HSoVgPe7By
— Michael Flores (@fivewithflores) March 4, 2024
Or more specifically, I won with primarily Roman's spells grafted onto Matt Costa's mana base.
Since that time, ![]()
![]() seems to have become more and more a part of the metagame. I know I face it much more on Magic: The Gathering Arena than I did prior to Murders at Karlov Manor.
seems to have become more and more a part of the metagame. I know I face it much more on Magic: The Gathering Arena than I did prior to Murders at Karlov Manor.
Again for context, I lost Game 1 of a ![]()
![]() mirror in the Top 4 of my RCQ, to Jace, the Perfected Mind with exactly fifteen cards in my library. I was ahead on seemingly every metric... But conventional
mirror in the Top 4 of my RCQ, to Jace, the Perfected Mind with exactly fifteen cards in my library. I was ahead on seemingly every metric... But conventional ![]()
![]() can't really "stop" anything in the late game. It can kill creatures. Given an untap it can destroy or exile almost any type of threat... But with No More Lies as the primary permission spell, actually stopping a threat before something bad happens is pretty dubious.
can't really "stop" anything in the late game. It can kill creatures. Given an untap it can destroy or exile almost any type of threat... But with No More Lies as the primary permission spell, actually stopping a threat before something bad happens is pretty dubious.
This past weekend I won "another" MTGA Event with UW before heading into the gym, including two decisive wins over other ![]()
![]() decks, both armed with Jace. I realized folding up my iPad that I had maybe become more adept at Standard
decks, both armed with Jace. I realized folding up my iPad that I had maybe become more adept at Standard ![]()
![]() mirrors than I have been at Modern Burn mirrors. Yeah. Crazy!
mirrors than I have been at Modern Burn mirrors. Yeah. Crazy!
This seems like one of the most important matchups you can know in competitive Magic right now, so I thought I'd share all the specifics of how to win... Or more importantly, not lose.
Stage One: Turns 1-7
You can "lose" the game on turn four or thereabouts. But even if you've "lost" the games go so long you have a lot of time to try to make up.
What do I mean by this and what can be done, for or against?
Only one card matters prior to turn four, and you only play one copy.
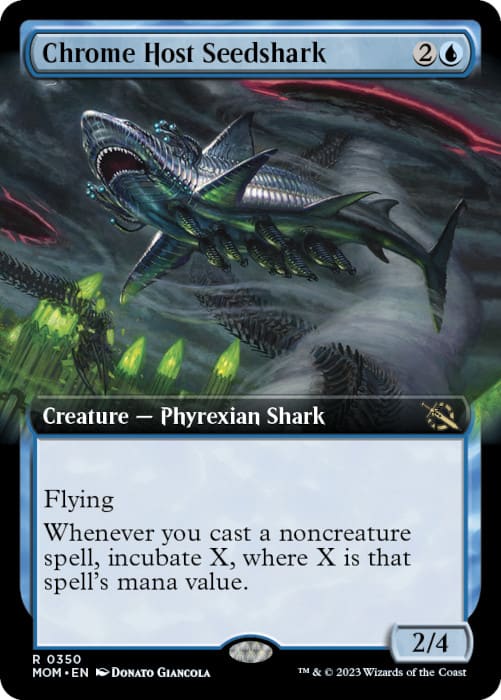
If you can land a Chrome Host Seedshark sometime during Stage One, you'll at least be ahead. Again, mature games take about thirty turns to win, so even if you're ahead (or the opponent gets ahead) you'll probably have a lot of time to catch up [or piss away your lead, depending].
Landing a Seedshark at this point in the game would require some kind of unusual circumstances so it's difficult to describe / systematize. Like maybe the opponent is desperate for a land drop and taps out for a Deduce or Clue-sacrifice main phase? I think it's much more likely you can land a Seedshark around turn five with No More Lies backup, but that game plan is pretty risky against opposing four-mana spells. I kind of don't recommend any kind of Seedshark gambit at this stage of the game, but it's in the range to note that you can, in fact, get ahead that way.
It's equally important to note that no matter how far ahead you get with Seedshark you can be deuced by two cards that aren't otherwise particularly good. A Get Lost followed by a Temporary Lockdown are going to deprive you even of the Clues you just got. The likelihood that this stuff is worth fighting over is going to be highly context dependent... But when I said twice already that there is still a lot of game left even if one of you gets a lead at this stage... I wasn't kidding.
The important cards at this stage of the game are the four-mana ones: Memory Deluge and The Wandering Emperor. Memory Deluge is particularly vulnerable to No More Lies at this point; and you probably have to eke most of your offense out of The Wandering Emperor, so risking either into an open ![]()
![]() is going to take a hell of a soul read.
is going to take a hell of a soul read.
You can lose the game in this stage primarily by screwing up and letting the opponent resolve one of the key fours. The reality is you can't stop them from resolving one later in the game. The game here is mostly about turning on No More Lies, especially when you don't have to. Don't do it. The game is going to go thirty turns! Don't get impatient.
In my RCQ, after losing Game 1 to the lethal Jace, I mulled to five in Game 2. I had a Deduce to help draw lands... But it didn't. I found myself stuck on three lands for several turns. I never - and I mean never - broke the Deduce Clue. Almost everyone would in that spot! You need to draw into lands, right?
Yeah... But not at the cost of dropping shields to allow the opponent to resolve The Wandering Emperor or Memory Deluge during Stage One.
The game went thirty turns and I had time to catch up.
You'll have time.
I talk about this in the next segment: One of the most important cards to suppress is Restless Anchorage. You might be tempted to use Field of Ruin on turn three during the opponent's end step to take out an opposing Restless Anchorage. One of my opponents on Saturday did this. I tapped the soon-to-be-dead creature land, got my replacement basic, and resolved The Wandering Emperor.
Congrats! Now what?
You can't stop the opponent from resolving The Wandering Emperor during Stage Two or Stage Three. But when I say you can lose in Stage One? You can't really lose; but you can put your own back against the wall for the next fifteen turns. The worst thing is catching up on every other metric but being down 10 life. Who do you think that game is going to favor in what is ultimately going to be a fight between Mirrex Mites, temporary Birds, and Map tokens?
Stage Three: Turn Thirty
You'll notice we skipped Stage Two. Don't worry, we'll come back to that.
I've won the vast majority of my games with all my Restless Anchorages tapped on the last turn of the game. Part of this is because I didn't risk them earlier in the game. During Stage Two, less careful mages might have to discard to hand size because they get a little too Deduce-happy, or you let them build some very fleeting advantages with Memory Deluge.
There is a finite number of Field of Ruins (three or four) against two Mirrex and four Restless Anchorage in the optimal ![]()
![]() list. What you don't want to do is expose Restless Anchorage to March of Otherworldly Light or Get Lost in Stage Two. What you really want to do is overwhelm all the opponent's resources in a short burst of offense over 1-2 turns. Make it so they just can't react to everything at the same time. Create a different choke for them: Maybe not cards in hand; maybe on mana. Maybe on relevant interaction against specifically a 2/3 temporary Bird.
list. What you don't want to do is expose Restless Anchorage to March of Otherworldly Light or Get Lost in Stage Two. What you really want to do is overwhelm all the opponent's resources in a short burst of offense over 1-2 turns. Make it so they just can't react to everything at the same time. Create a different choke for them: Maybe not cards in hand; maybe on mana. Maybe on relevant interaction against specifically a 2/3 temporary Bird.
For me, I've found I just don't lose to Jace any more because I check how many cards are in my library every so often. Jace doesn't do anything except one-shot kill you. A non-lethal Jace is actually terrible (tends to flip over Memory Deluge, which you can cast and resolve for free).
What you want to do is build advantage in Stage Two such that the opponent can't react to your Anchorage onslaught in Stage Three. It really is going to come down to Anchorages in a mature game; with extra copies of The Wandering Emperor you sandbagged in Stage Two acting as 4 mana +1/+1 activations to push the clock (really). I routinely sacrifice two copies of The Wandering Emperor over the last two turn cycles, just to push damage.
Sometimes it's okay to risk a Restless Anchorage earlier than the last turns of the game (for instance to finish off a Planeswalker in Stage Two); but what you really don't want to do is let the opponent trade a spell for your creature land. The worst spell is Lagoon Breach.

I recently used Lagoon Breach to stow away a Horned Loch-Whale and "kill" an attacking Restless Anchorage during combat. Of course, my opponent put the key nonbasic back on top. I then used Field of Ruin to kill a different Restless Anchorage and shuffle the first one away.
Then ten turns later the Loch-Whale (which has a pesky Ward ability) joined in for the lethal four-Anchorage attack.
This matchup goes thirty turns.
You are highly unlikely to lose to manascrew or any kind of a resource imbalance in Stage One. You can, however, give it up by letting them land one of the 4 mana bombs too early.
Ergo, it's all about planning. And stowing away an attacker for the turn the opponent won't have the mana to interact with it.
Back to the Middle - Stage Two: Building Advantages
One of the most important cards to notice is Seachrome Coast.
I breathe so much easier every time I see a Seachrome Coast these days.
— Michael Flores (@fivewithflores) March 16, 2024
If you see a Seachrome Coast, likely you will just win the game.
This is the first time in the history of Magic that I think you can make such a preposterous statement. Seachrome Coast is an excellent Magic: The Gathering card!
But if someone is playing it in ![]()
![]() right now, it means they have a non-optimized land mix. The probably are behind in Mirrex, or don't play Sunken Citadel. Maybe they don't have enough Field of Ruin.
right now, it means they have a non-optimized land mix. The probably are behind in Mirrex, or don't play Sunken Citadel. Maybe they don't have enough Field of Ruin.
Any of these factors is a huge deal! Uncontested Mirrex is unlikely to win the game, but it is super annoying. The good thing about Mirrex is that you can resolve Ezrim with artifacts already in play (Ezrim's own Investigate ability goes on the stack, meaning you can kill him in response). However any and all tokens-based advantages are hard to defend through Temporary Lockdown. So, don't get too married.
We've said repeatedly that it's bad to let the opponent to resolve The Wandering Emperor and Memory Deluge in Stage One; but between turns seven and thirty it's quite difficult to stop them. Luckily, they can't stop you, either.
Stage Two is about two things:
- Building Advantages - Mostly this means using Memory Deluge and other card drawing to keep your land drops going. If you can keep hitting land drops and the opponent does something dopey like discarding to hand size, that means that you will be at an advantage on the fateful thirtieth turn.
- Resolving Threats - probably both of you will resolve The Wandering Emperor at some point in this Stage. Context is going to be important here, but it's generally good to try to kill theirs and keep yours. We talked a little about The Wandering Emperor resolving in Stage One (for instance against an overly aggressive Field of Ruin). The counter-play is your own Wandering Emperor. But if they can attack first, you're going to need another counter-play. Luckily, no one's No More Lies are going to be doing anything if the game goes in this direction.
The other key threats to resolve in Stage Two are Ezrim and The Eternal Wanderer. At 8-9 (or for goodness sakes, 14) mana... your stuff is basically going to resolve.
That is the genius of Roman's build. Ezrim in particular is just better than more card drawing, especially red-hating specialists like Union of the Third Path. The reality is, answering Ezrim is simply costly. No matter what, you will tend to get two extra draws out of it.
The Eternal Wanderer is the ultimate trump in Stage Two. First of all, it's the best threat in either deck. The 2/2 double strikers are real threats and don't take long to win. But the "Blink" ability is the real killer. The Eternal Wanderer can combo directly with Ezrim of course, but the ability to gain loyalty while picking off opposing tokens is chef's kiss.
If you can resolve Ezrim or The Eternal Wanderer at this Stage, you're way, way, ahead. You're not super likely to win before the third Stage, but you can definitely put opponents on their heels.
The important thing to remember in Stage Two is that Memory Deluge is not the end of the world. Even if it resolves, you'll have plenty of time to catch up; and cards in hand are far less important than opposing threat management.
Summary:
- Turns 1-7: Try not to lose. You're not actually going to lose for more than twenty turns; but you can avoid making it easy. Don't give the opponent an easy setup to resolving a four by misusing a Field of Ruin
- Turns 8-30: Get something on the battlefield. Jockey for position. Draw cards. A lot of it is just posturing at the point. No one wins until turn thirty in most cases; but make sure you know how many cards are in your library!
- Turn Thirty: This is when you get to show off your superior planning and deck design. You beat Seachrome Coast because in order to play it they had to cut out something important. Sunken Citadel will be powering all your attacking Birds on the last turn.
LOVE
MIKE