For those just returning home from Gen Con, I hope you bought some art! Now that it's lying flat, out of the mailing tube, or in a suitcase, let's talk how you'll get that thing on the wall.
Let's get some facts out of the way:
- Framing is stupidly expensive.
- You and I should not frame it on our own. It will be terrible.
- Due to framing being done so rarely, being objective about quality is difficult.
- Rarely, if ever, will you frame more than two artworks at the same time.
- Reframing an artwork is incredibly rare. Getting it right the first time is paramount.
- Paper artwork, original watercolor drawings, lithographs, and giclee-on-paper images should always be under glass.
- Oil paintings are traditionally not under glass.
- Canvas paintings can be hung with or without a frame.
- I have way more than one article worth of information on framing. To properly cover this issue, this is Framing 101.
Beginner Framing 101
These are the basics, the foundational principles for getting your frame from being under books - since you rolled it and you have bent corners - and placed onto the wall. If this is your first time picking up art that isn't a Bob Marley poster, this section is for you.
 In short, when thinking of framing, image you're playing Burger Time and the framing process is like making a delicious, multiple-ingredient burger. You've sandwiched out moisture and air, keeping in the delicious art. It is absolutely paramount to protect your art from a variety of things, from pet hair and UV rays to a Juicy Lucy hamburger squirting out molten-injected cheese past your cheek and onto the art.
Basically, you're trying to take organic materials - wood and paint pigments - add water to them, and try to keep as much moisture from reaching them to react negatively. If you live in humid temperatures, I'd put everything under glass to be sure. I say glass, but glazing is also an option on terminology.
On that note, let's get some verbiage out of the way:

Image from framedestination.com
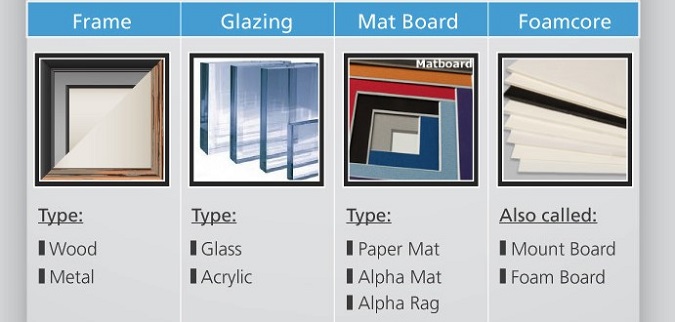
Image from framedestination.com
You always have choices on what you want to do, and the better-preserved you want your artwork, the more it will cost you. If you've been diamond shopping, you know on a very visceral level that cheap mat boards, like a low clarity level, will impact everything.
With that out of the way, when you're starting to put things on the wall, you start here:
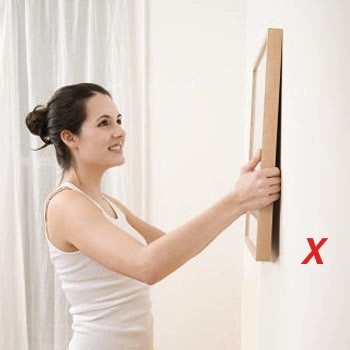
Stage 1 - Tape It to the Wall - Whatever
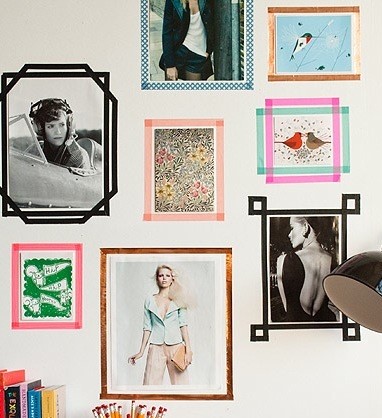
If you're into the DIY/Pinterest feel, check out the DesignSponge idea.
If you want a John Avon poster in your dorm room, you could just tape it. It's an option. It's not my preferred option, but when you buy an open-ended print from an artist for $5 or a poster of an image, there isn't much value there. This is the only time you can put Magic art in your bathroom: cheap works with cheap attachment options.
Stage 2 - Go to Michael's, Jo-Ann Fabrics, or Other Craft Stores to Have It Framed
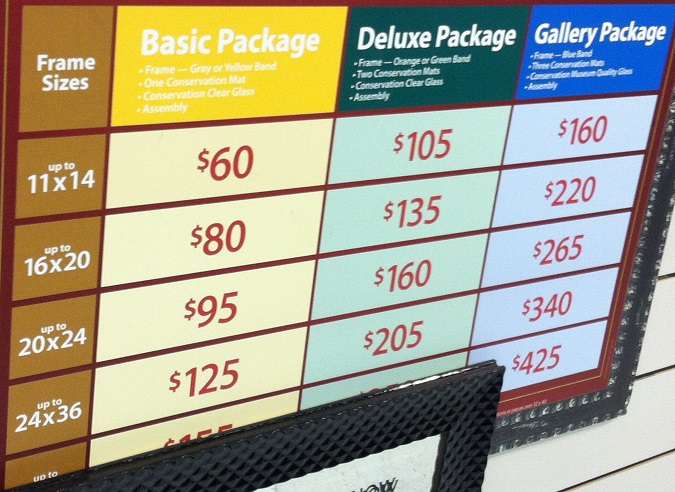
If you live in a super-rural area - I'm talking western North Dakota among other places - this might be your only option.
You just need to keep in the back of your mind that if a store lists readymade options, you're paying too much - period. These deals are like the $99 Valentine's Day earrings you see at Sears.
These are low-quality framing materials, and the newest members on the team conduct these readymade plans. This means the risk of damage, oil from fingerprints, and a variety of other issues will be issues affecting your art. Don't do this unless you have no other options. Even if you're incredibly lazy, this is not a good option.
Stage 3 - Buy a Frame from Target
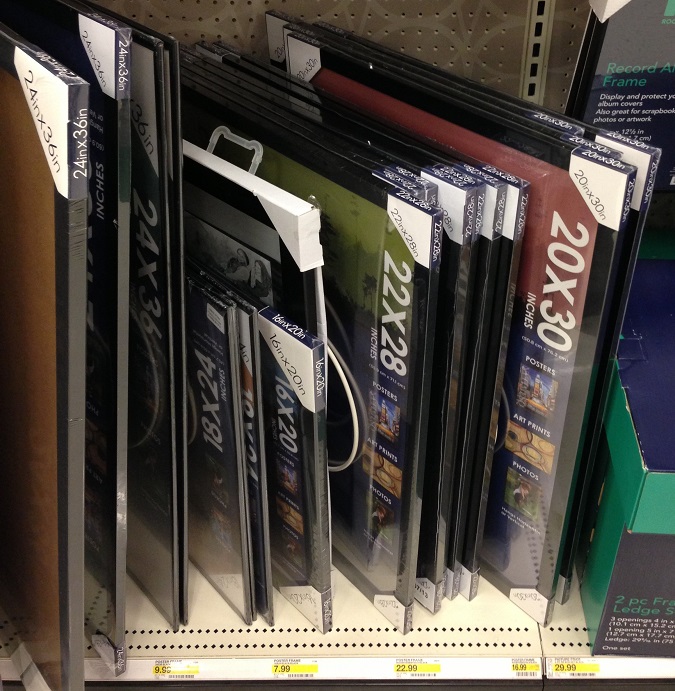
If you bought a print or digital print (as there is no original), these readymade frames from Target do just fine. You want the frames with at least 1" of wooden frame, as it's solider. You'll always see stacks of them in the store. Most are $10 to $40, and you're good to go.
Stage 4 - Add a Fixative/Lacquer for Protection

Image from explore-drawing-and-painting.com
If moisture condenses on wet varnish, the surface is covered with a velvety covering called bloom. When using colored pencils, as Terese Nielsen does, wax bloom can be a condition issue. While Terese uses a fixative to prevent fading or smudging, the first question you ask after purchasing an artwork is, "Has it been fixed or lacquered?" The answer is almost always "yes", but if you buy a pencil sketch or a secondary sketch, this could come up.
Bring the piece immediately into your local college's art-making workshop or a local Blick or Utrecht store, and start asking questions on what to do. By "fixing" your art, you prevent smudging, bloom, moisture, and dust from collecting. By doing so, you can clean the art by using a dry brush instead of painstakingly cleaning it or, worse, bringing it to a conservator.
Some argue that when under glass, any fixative isn't necessary and that it can dull colors, but I always do it to be totally sure with two coats. This page on Explore Drawing and Painting gives more of a primer if you're interested. Moisture destroys art so often. It's actually pretty incredible how fast a seasonal temperature change can destroy an artwork's vibrant color.
Stage 5 - Attaching Your Art to the Wall Matters Now

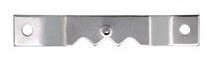
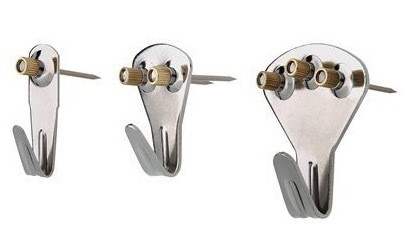
When you buy a cheaper frame like something at Target, you'll see a back that looks like this. I've added two types of framing devices to it. When you walk into the duct tape/3M aisle at Target, there should be little framing kits that look something like the twenty-pound weight kit shown here.
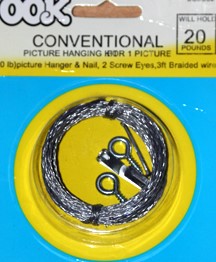
They are pretty cheap, usually under $10, and have everything to hang your artwork. The reason you want wire is that the alligator can literally rip the top part of your frame off with sheer weight and gravity over time. It's not awesome when it happens. Use wire - just do it. What I find is best is when you use wire, but attach it to the wall with the one, two, and three nail hooks. Obviously, the heavier the art is, the more nails you'll need. This is for when you can't find the wood studs in your wall or don't want a giant nail in there. I think it makes it sit more flush with the wall.
 |
 |
Intermediate Framing
At this stage, you're immediately thinking of the added cost when you first see an image that you enjoy. It's usually a number at least $200. Also at this stage, some people choosing not to frame their art. I find it infuriating when artworks are damaged because people don't preserve their art; they just place them on their desk - in direct sunlight, of course. It's the overprotective people and the anti-preservationist people who inhabit this stage.
Stage 1 - Buy a Frame from Target or Ikea and Buy a Custom Mat Board from the Internet
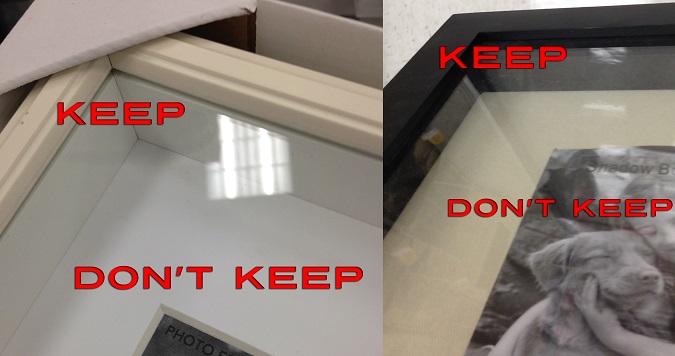
If you're going with a solider base, unlike paper - say it's an oil-paper work on board - put it into a shadow box, as shown above. Keep the exterior parts like the frame and glass while throwing out the rest.
If you buy an Internet-purchased mat, it can look really sharp on the cheap. I would make sure the mat is, of course, acid-free with as spiffy a preservation material as you can muster. Since you can pick your size, keep the art flush inside it, snug in there.
As for acid-free, it's like "non-fat" on your foods - it's a total lie ninety percent of the time. The area below is lifted from the mat entry on Wikipedia and is the best thing I've found on the Internet for explaining it. In short, just like our currency, you do not want mere paper, but something with cotton in it:
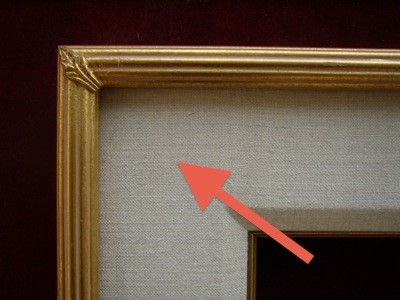
Stage 2 - Get a Frame from a Garage Sale, Clean It, and Reuse It
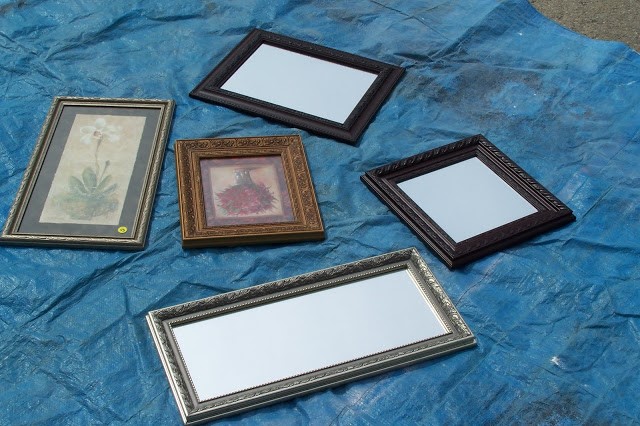
I like the idea of using crazy old frames with a lot of character on them. Antique shops are ideal, but you'll pay for it huge because some cheesy artwork from the '20s will invariably be in it. If you can find a gorgeous, golden, giant frame there, though, get it. I've done it once, and I'm still waiting for the right-sized piece to use it. (It's huge.)
Once you acquire the frame and have cleaned it thoroughly, buy a mat online that fits the frame and the "face" of your artwork, hiding everything but the face.

The face is the part where the art is, and you usually have a mat against the edge of the face. Since the frame will be clearly not the right size, the art won't be flush against the sides. You will need archival tape. Archival tape is tape that will not yellow or break down over time. The adhesive it uses is reversible and will not damage an artwork. Before you buy your tape to hold your artwork in place, find out if the tape you want is one that is reversible with heat or with water by reading this article.
Stage 3 - Use Pinterest for Ideas

I know, it's Pinterest, but occasionally, there's a good idea on how to frame - not just Live, Laugh, Love arrangements on the stairway up to your three wonderful children's bedrooms or the tree above.
What it can show you is how multiple images interact with each other. For example, imagine the tree above were a Magic card back and you had a Magic original artwork of each color or group, such as planes like Mirrodin and Ravnica. It forces you to think about how they interact in your home. As a reminder, make sure it passes the sofa test for your spouse and visitors.
Stage 4 - You Live in an Unfavorable Climate

Extreme weather annihilates art. A setting in seventy-two degrees and with no humidity, wind, or direct sunlight is ideal. Miami and Seattle deal with humidity while Minneapolis and Buffalo deal with biting cold in the winter with extreme heat in the summers. If you live near the ocean, you deal with ongoing humidity. If you're near the Great Lakes, it's humidity and cold, with all four seasons wreaking havoc.
Players still in college should understand that owning original art alongside shots and beer pong isn't the best idea, but more importantly, they leave their windows open during all seasons to "regulate" temperature during house gatherings. Art hates college - it really does.
Be incredibly vigilant about really looking at your art every three months. I put in a Google calendar alert to check in on paintings and refuse to frame things in January or July due to the potential of adhesive slippage or frame warping.
Stage 5 - Frame the Art with Cards
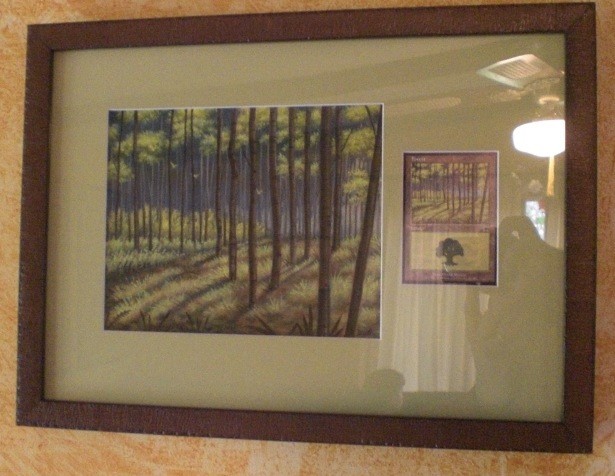
An original Forest by Nanna, found on OriginalMagicArt.com
Folks on OriginalMagicArt.com sometimes place the card next to the artwork, giving the piece context. While I'm not a fan of this, being an art purist and one who always loves the DailyMTG name-that-card-from-art quiz, some folks do like seeing the card. I've seen artist proofs, all versions of cards like foils and foreign-language versions and signed cards all be placed next to the art.
Cutting the mat is considerably harder, and spacing it to the border will have to result in sending it in to a professional. You don't want to do this at home. If you do, your risk of slippage is immense, and that causes abrasions on the art. Don't do that.
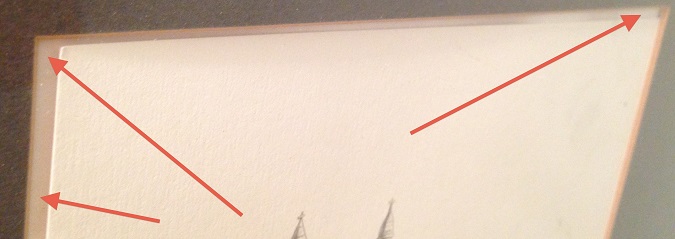
Here's some slippage in action in my own home.
If the artist frames the art for you, he or she could sign the actual mat if no signature is present on the artwork.
Advanced Framing
This is the step where you're buying a serious $1,000 to $9,000 Magic artwork, fully grasp the long-term preservation of your work, and/or are prepping a piece for an art exhibition. If you have spent more on framing than a major work, you know exactly what I mean. Many frames for limited-edition-numbered prints are in this stage. (Think Warhol's soup cans or Robert Indiana's LOVE imagery.)
Stage 1 - Ask the Artist to Frame It for You

We all can't have artists be incredible framers like Robert Kulicke.
The artist will invariably be able to do it cheaper than you and end up having a frame exactly match the artwork as the artist envisioned it. That's powerful and very much worth it. If you do this at a convention, which I would recommend at a place such as Spectrum Live or Illuxcon, you can talk out the framing process with him or her quite easily. Also, having the art framed for you removes the fear from you breaking/wrecking the art during your drive or flight home.
As a bonus, the artist will make a little extra money on the artwork, and you'll save a ton. Ask every time; it's worth the extra few weeks to get it. Of course, people like Donato have set up low-end and high-end framers, as explained in his Muddy Colors post, but every artist has a go-to source when he or she is at the Magic commission stage. (Rarely are people chosen for Magic right out of art school; more often, art is created by more-established people.) Very rarely have I had an artist frame my work for me, but when it has happened, I have been considerably more pleased with the framing job.
Stage 2 - Contact Your Local Art Collective to Find That Hidden Local Framer

This is a clean studio. Really.
Every major city has a site, nonprofit, or group where artists congregate. Often, it's the place where they need to earn fiscal sponsorships to submit grants or take mini seminars. In MSP, it's called Springboard for the Arts, which has a directory to find my framer, DVG Fine Arts and Framing, LLC. If you live in Chicago, you'd check out Chicago Artists Resource to find twelve framing hits, including Artists Frame Service and Art Services to find Joel Fromer. I'd go with Fromer; he has no connected website, but he's still in business. You know he's quality and reasonably priced because the man doesn't really need to advertise; that alludes to consistent business by referral, which you want!
Just know that when you walk in, it often won't be immaculately clean or organized. Since a family business or a single person often runs it, there will invariably be some (to a metric ton of) clutter. Don't let that fool you!
Stage 3 - Ask Your Local Museum if You Can Pay Its In-House Framer

If you can use a museum's internal framer, the cost is silly-cheap because they don't know the value of a markup margin since it's not a normal profit-making area of a museum. I have used this when I saw a really cool framing example in an exhibition that I loved for an artwork I have in my house. Praising the handiwork tends to help in securing a deal. Those who work behind the scenes very rarely receive praise from the public directly or via comment cards.
If the museum won't allow outside framing, ask their registrar where they outsource their framing. Every museum has an outside place for giant exhibitions as a contingency/crisis plan when their framer is sick or traveling. The Weisman Art Museum in Minneapolis uses Museum Services, Inc, as an example.
Stage 4 - Church Up Your Mat

I like to church up my mat boards a bit more than normal. The solid green mat for a green Magic card - or worse: orange - to "bring out the color" in the piece is just awful. Liven your piece up by going untraditional. The extra $50 to $200 is very much worth it when you get to some original Magic pieces by bigger-name artists. If you have one of Donato Giancola's original artworks, you don't use a Target frame. You just don't.
Two things to keep in mind if you want to swing for the fences between your art and frame:
Liners
Historically, these are used with oil paintings. (Remember to go without glass for oil paintings.) The liner fits between an artwork and the frame, providing both a pleasing and practical alternative to matting. They're basically a piece of wood wrapped in a linen cloth. Here's a quick primer if you want to learn more.
Fillets
The fillet is normally used as decoration in the interior of the frame or under a mat inside a frame. Its role is to draw the eye to the inner part of the painting. If you've been to the British Museum or Louvre, you'll see them everywhere.

Stage 5 - Gallery Framing Prep
You will want the previous information on the back of the painting, the provenance of who owned it before you, what it sold for previously, and who framed it before you owned it. When you reframe pieces, it affects the value and prestige when you show the "sticker on the back." If a gallery added it for a show, that gallery has a huge role in determining value. If you use a famous gallery or framer, the value increases due to the esteem and preservation quality. Also, once you care about gallery showings, you will find that reframing a piece isn't that uncommon, especially if it's on paper.
In addition to normal framing, I've found it helpful to have that sticker on the paper on the back of framed artworks to hold basic provenance information when a label can't be found. It's a label that looks something like this on the paper area of the framing, never on the actual frame:
When they are old and mangled, they look basically like this:

Keep them as current as possible. There're some serious penalties if a label is attached, marking the provenance and removing it, thus wiping the history clean.
Closing Remarks
Those're the basics for framing. There is a little legwork on your end, but it's very doable with under fifteen minutes of Google searching. If you're spending hundreds of dollars on a frame, you should do a little research.
In the future, if people are interested in Framing 201, 301, and 401, the preservation, provenance, presentation, and promotion areas, we could cover those later. You let me know if a standalone or another Vorthos potpourri article would be best. It's up to you! Kind of!
See y'all next week.
- Mike